PLC Bottle Filling Machine: Step-by-Step Project
A bottle filling machine is the perfect first real project for a PLC student or a technician moving beyond simple start/stop logic. It has everything: a conveyor, sensors, a timed fill cycle, a valve, a counter, and enough edge cases to actually teach you something. This post walks through the whole thing, from writing the I/O list to a runnable ladder sequence you can load into Studio 5000 or adapt to any other platform.
How the Machine Works
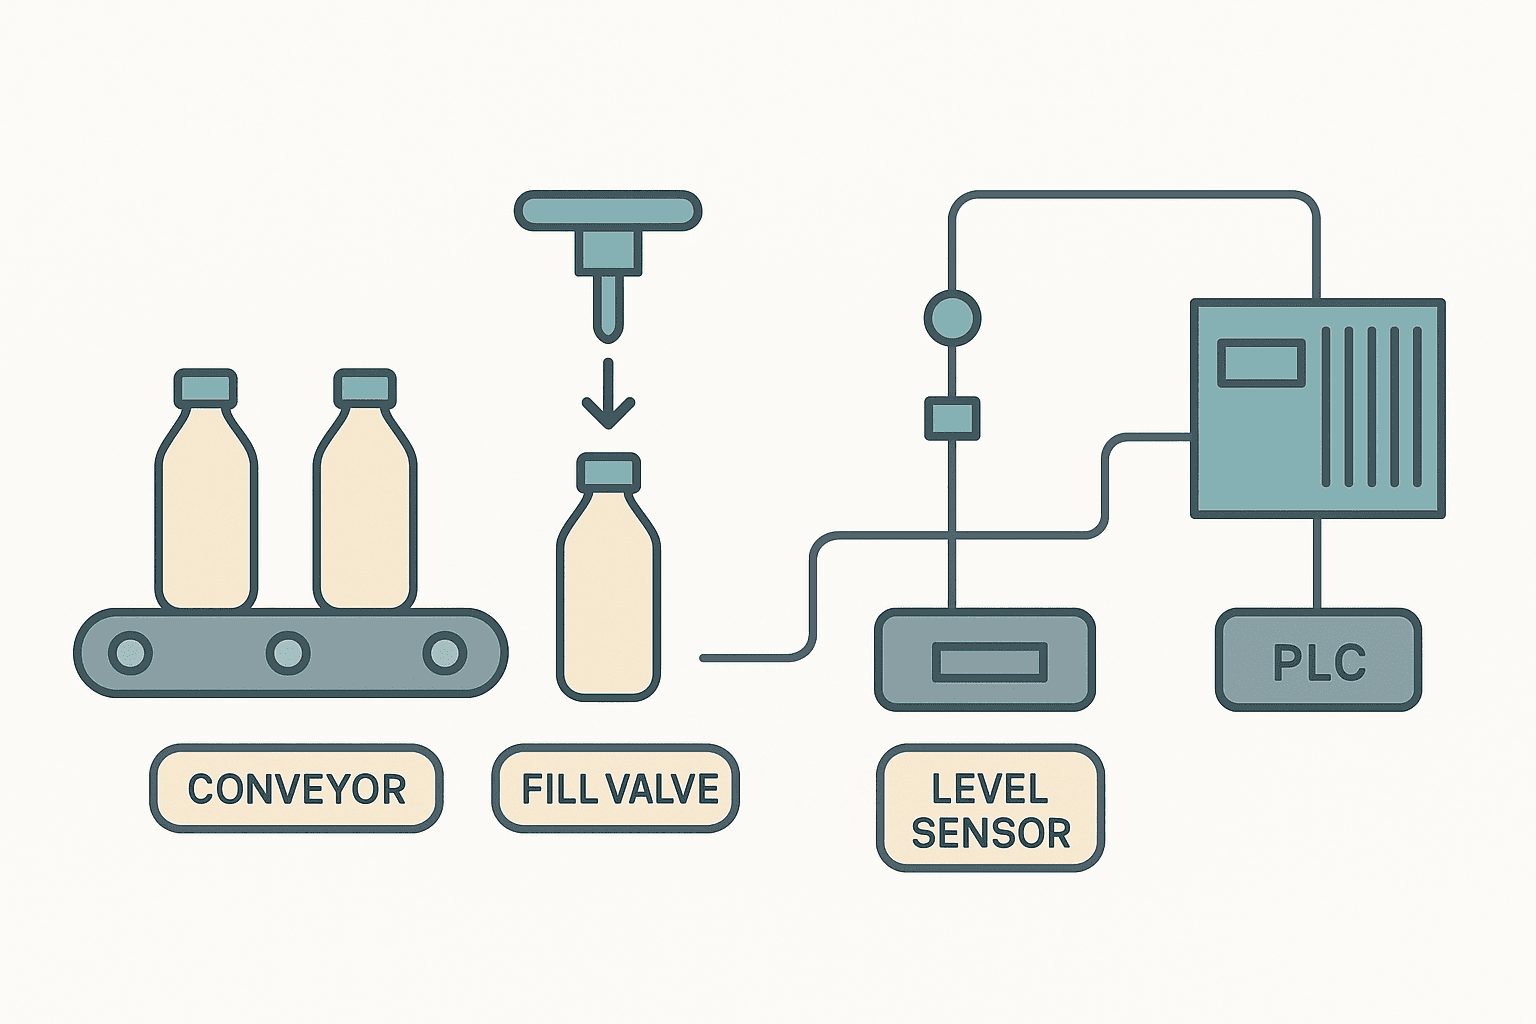
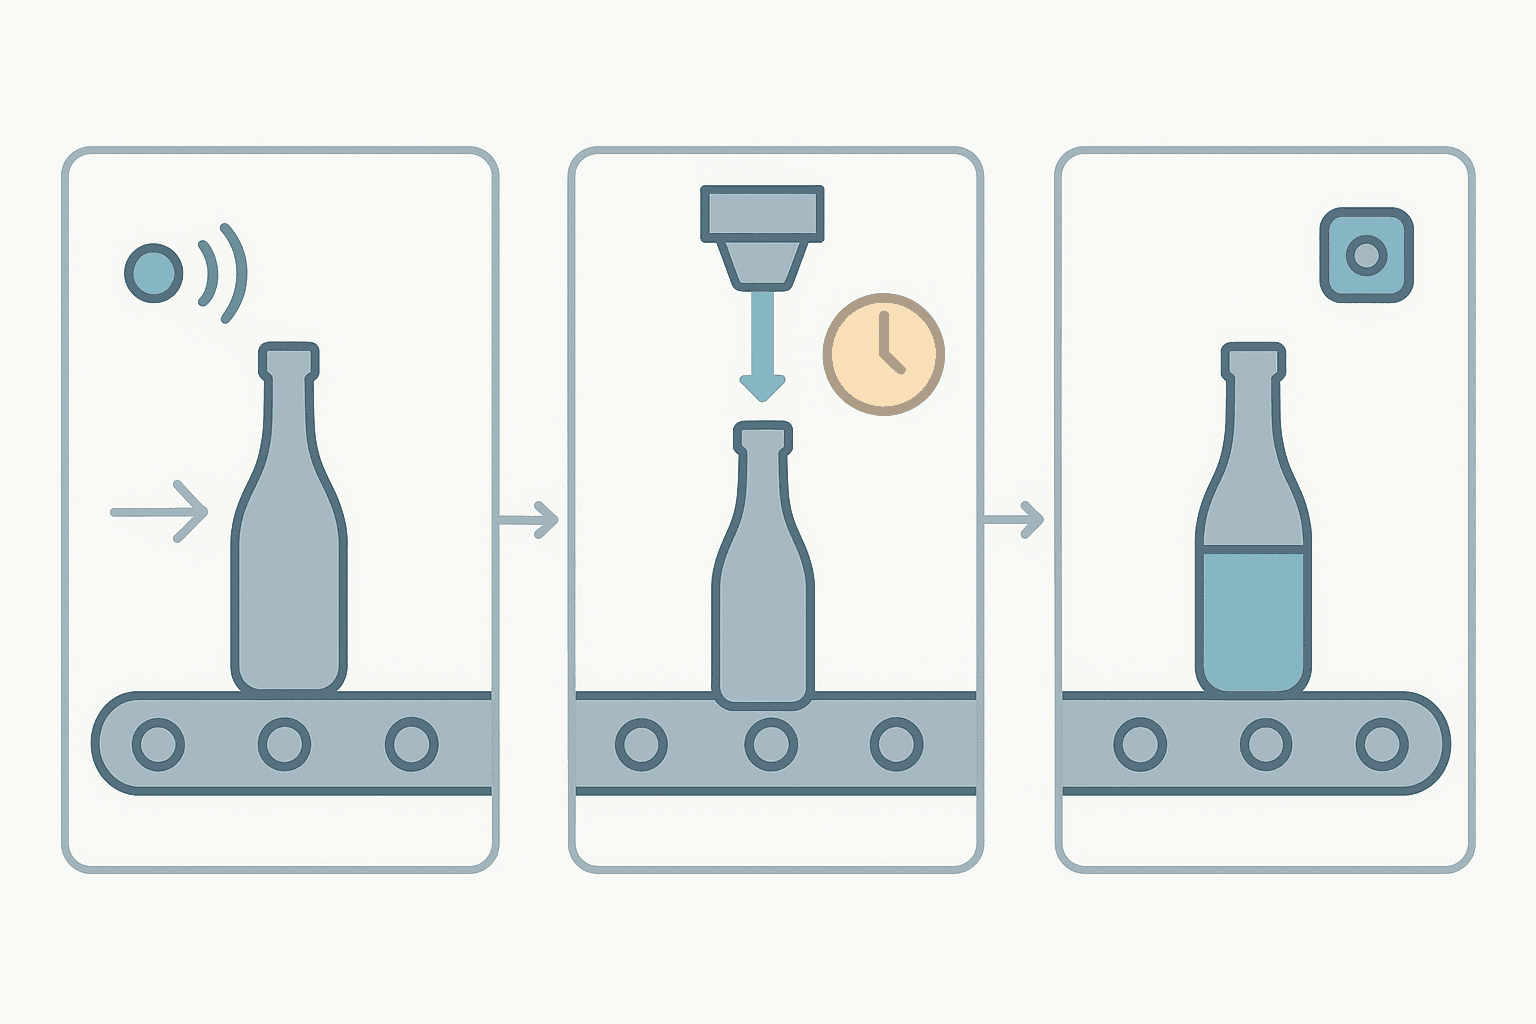
The setup is intentionally simple so you can replicate it on a training rig or even simulate it in software. A conveyor carries empty bottles single-file under a fill nozzle. A proximity sensor detects when a bottle is in position. The conveyor stops, a solenoid fill valve opens for a timed period, the valve closes, and the conveyor restarts. A separate sensor downstream counts filled bottles and stops the run when a batch target is reached.
That is it at the functional level. But the devil is in the details: what happens if the bottle sensor never triggers? What if the fill valve does not close? What if the operator hits stop mid-fill? These are the questions that turn a textbook exercise into real engineering.
I/O List for the Bottle Filling Machine Project
Define your I/O before you write a single rung. Here is a practical list for this project. Adjust addresses to match your actual hardware.
| Tag Name | Type | Address (Logix) | Description |
|---|---|---|---|
| PB_Start | DI | Local:0:I.Data.0 | Momentary start pushbutton, N.O. |
| PB_Stop | DI | Local:0:I.Data.1 | Momentary stop pushbutton, N.C. wired |
| Prox_BottleInPos | DI | Local:0:I.Data.2 | PNP prox sensor: bottle under nozzle |
| Prox_BottleFilled | DI | Local:0:I.Data.3 | PNP prox sensor: bottle past nozzle (count) |
| FillValve_Open | DO | Local:1:O.Data.0 | Solenoid fill valve, energise to open |
| Conveyor_Run | DO | Local:1:O.Data.1 | Conveyor motor contactor or VFD run command |
| PL_Running | DO | Local:1:O.Data.2 | Panel pilot light: system running |
| PL_BatchDone | DO | Local:1:O.Data.3 | Panel pilot light: batch complete |
| HMI_BatchTarget | INT | N7:0 / DINT tag | Operator-set number of bottles per batch |
| HMI_FillTime_ms | INT | N7:1 / DINT tag | Fill duration in milliseconds (HMI entry) |
Sequence Design: States, Not Rungs
Most beginners try to write this as one giant blob of ladder rungs and then wonder why bottles are getting double-filled or the conveyor starts before the valve closes. The fix is to think in states first. Draw it out on paper before you open the software.
- IDLE: System powered, waiting for start. Conveyor off, valve closed.
- RUNNING: Conveyor on, transporting bottle toward fill position.
- FILLING: Conveyor stopped, fill valve open, fill timer counting.
- FILL_DONE: Fill valve closed, short settle delay (100 to 200 ms), then back to RUNNING.
- BATCH_COMPLETE: Bottle count reached target. Conveyor stops, PL_BatchDone on. Wait for operator reset.
In Studio 5000 you can implement this with a DINT tag called FillerState and use values 0 through 4. Each state block is a set of rungs gated by an EQU instruction comparing FillerState to the state number. It is not fancy SFC, but it is explicit and easy to debug on a laptop at the machine.
PLC Bottle Filling Machine: Core Ladder Logic
The rung below handles the transition from RUNNING into FILLING and back again. This is the heart of the fill sequence: the bottle-in-position sensor stops the conveyor and starts the fill timer. When the timer completes, the valve closes and the state advances. This is the rung new engineers always get wrong, usually because they forget to interlock the conveyor output with the fill state.
Bottle Filling: Conveyor Stop, Fill Timer, and State Advance (Studio 5000). Ladder logic (4 rungs): Rung 0: examine if Sys_Running is on (XIC), then examine if Prox_BottleInPos is off (XIO), then energize output Conveyor_Run (OTE). Rung 1: examine if Sys_Running is on (XIC), then examine if Prox_BottleInPos is on (XIC), then TON on Fill_Timer. Rung 2: examine if Sys_Running is on (XIC), then examine if Prox_BottleInPos is on (XIC), then examine if Fill_Timer.DN is off (XIO), then energize output FillValve_Open (OTE). Rung 3: examine if Sys_Running is on (XIC), then examine if Fill_Timer.DN is on (XIC), then examine if Fill_DN_OneShot is on (XIC), then either CTU on Bottle_Count. Rung 1: Conveyor runs only when the system is active and no bottle is in position. Rung 2: TON fill timer starts when a bottle is detected. Rung 3: Fill valve energises while timer is running (not done). Rung 4: On the rising edge of timer done, increment the bottle counter. Sys_Running is a BOOL set by your start/stop seal-in logic. Replace HMI_FillTime_ms with a fixed preset (e.g. 2000 for 2 seconds) if you are not using an HMI.
The diagram above evaluates one scan. Run these exact rungs on a real scan cycle to watch the latching and the timers behave.
Run this in the simulatorFillValve_Open is driven by XIO(Fill_Timer.DN), not by XIC(Fill_Timer.TT). Both work while the timer is timing, but using .DN as the interlock means the valve stays closed if the timer preset is zero or if the tag gets corrupted to a done state. It is a small thing, but these are the gotchas that cause rejects on the line.Batch Counter and Auto-Stop Logic
The CTU counter in the rung above accumulates every fill cycle. When Bottle_Count.ACC reaches Bottle_Count.PRE (which you load from HMI_BatchTarget), the counter's DN bit goes true. Wire that into a rung that clears Sys_Running and lights PL_BatchDone. Then add a separate operator reset rung: XIC(PB_Start) and XIC(Batch_Done) can both RES the counter and OTL the Sys_Running bit.
One thing to decide early: do you want the machine to stop immediately when the batch count hits, or finish the current fill cycle first? Finishing the current cycle is almost always right. So gate the batch stop on XIC(Bottle_Count.DN) combined with XIO(FillValve_Open): only stop the conveyor after the valve has closed.
Fill-by-Time vs Fill-by-Level: Which to Use
The project above uses fill-by-time: the valve opens for a fixed number of milliseconds. It is easy to implement and works fine for low-viscosity liquids like water when supply pressure is stable. For anything where pressure varies (gravity-fed tanks that drain down, for example) or for viscous products, you need fill-by-weight or fill-by-level using an analog sensor.
If you want to extend this project to use a 4-20 mA level sensor inside the bottle (or a load cell), you will need to scale the raw analog count to engineering units. The analog scaling calculator on this site does that math for you, and the post on 4-20 mA scaling formula for PLCs covers the formula you will drop into your structured text.
Fault Handling You Should Not Skip
Every real machine needs at least these three faults wired up, even on a training rig:
- Bottle jam timeout: If
Prox_BottleInPosstays true for more than 2x the fill time (say 10 seconds), the bottle has not cleared after filling. Stop the conveyor, set a fault bit, and flash a light. A TON with a long preset handles this. - Fill valve stuck open: If
FillValve_Openis commanded off but a flow sensor (if fitted) still sees flow, latch a fault. Even without a flow sensor, add a sanity check: if the fill timer is not running but the valve output is on, that is a wiring or output card fault. - No bottle detected timeout: If the system is in RUNNING state and no bottle arrives within a configurable window (say 30 seconds), pause and alert the operator. Empty conveyor or upstream jam.
Suggested Build Stages for Learning
If you are using this as a training project, build it in stages. Each stage gives you a working, testable machine before you add complexity.
- Stage 1: Manual mode only. Individual pushbuttons jog the conveyor and open the valve. Verify wiring and sensor polarity before any auto logic runs.
- Stage 2: Add start/stop with a seal-in rung and conveyor run output. Test the conveyor runs continuously and stops cleanly.
- Stage 3: Add the bottle-in-position sensor and fill timer. Test a single fill cycle manually by placing a target in front of the sensor.
- Stage 4: Add the CTU batch counter and batch-done stop. Set target to 3 and run 3 fill cycles.
- Stage 5: Add fault timers for jam and no-bottle conditions. Deliberately block the sensor and confirm the fault triggers.
- Stage 6: Add HMI screen (if available) with fill time entry, batch target entry, bottle count display, and fault annunciation.
Sensor Placement Tips
The bottle-in-position sensor is the most critical one. Use an inductive or capacitive prox sensor depending on bottle material: inductive for metal caps or metal bottles, capacitive for plastic or glass. Mount it so the bottle centre aligns with the nozzle when the sensor fires. A misaligned sensor is the number one cause of spills on first commissioning. Give yourself 5 to 10 mm of adjustment in the mount.
For the filled-bottle counter downstream, a diffuse reflective photoelectric sensor works well. Keep it at least 150 mm past the fill station so a bottle that is still settling does not get counted twice. If bottles are clear or translucent, use a retro-reflective type with a polarising filter, or you will get false triggers from the liquid surface.
Quick Reference: Timer Presets for Common Fill Volumes
These numbers assume a 1/2 inch (DN15) solenoid valve at 2 bar supply pressure and water as the product. Use them as a starting point and calibrate on your actual rig.
| Bottle Volume | Approx Fill Time | Notes |
|---|---|---|
| 250 mL | 1.5 to 2.0 s | Small PET bottle, water |
| 500 mL | 3.0 to 3.5 s | Standard water bottle |
| 1000 mL | 6.0 to 7.0 s | 1 L bottle, may need larger valve |
| 1500 mL | 9.0 to 10.0 s | Consider DN20 valve at this volume |
Where to Take It Next
Once the basic fill cycle is solid, there are several natural extensions that each teach a new skill. Add a capping station: a second pneumatic cylinder that presses a cap after the bottle exits the fill zone. That brings in cylinder sequencing, and the post on pneumatic cylinder sizing will help you pick the right bore for the capping force you need. Or wire the conveyor motor through a VFD and control speed from the PLC: slow the belt when a bottle is approaching the sensor, speed it up between bottles. That gets you into analog output and drive integration without a complex motion application.
Another good extension is replacing the fixed fill timer with a recipe system: store fill time, batch size and settle delay as a recipe DINT array indexed by product number. The operator picks a product on the HMI and the PLC loads the right values. That is exactly how real machines work, and it forces you to learn indirect addressing, which is one of the most useful skills you can build.
Frequently asked questions
What sensors does a PLC bottle filling machine project need?
Should I use fill-by-time or fill-by-level for a bottle filling machine?
How do I stop the conveyor only when a bottle is in position, not all the time?
What PLC timer type should I use for the fill cycle?
Can I build this project without real hardware?
How do I handle a bottle that gets stuck under the fill nozzle?
Now build it
You have just read about XIC and XIO. Reading a rung and making one behave are different skills, and the second one is the job.
Start / Stop Circuit
Beginnerabout 10 minThe first circuit every controls engineer learns: a motor that starts on a button press, keeps running when the button is released, and stops on a stop button, with stop always winning.
Build this rungFree, no signup, runs in your browser. See all 16 exercises.
Was this helpful?